위즈윅(WYSIWYG) 에디터, react-quill 사용하기
WYSIWYG(What You See Is What You Get)은 작성중인 문서와 출력될 결과를 동일하게 보여주어 문서 작성을 직관적이고 쉽게 할 수 있게 해줍니다.
리액트에서 WYSIWYG 에디터로 TOAST UI Editor, React Draft Wysiwyg, react-quill 등이 있습니다. 데모 페이지에 들어가 사용해본 결과 react-quill이 가장 사용성이 좋다 느껴져서 사용하게 되었습니다.
react-quill에 대한 사용법입니다.
1. 설치
npm install react-quill
2. 리액트에서 에디터 구현
ReactQuill 모듈과 css를 불러오고, quill에서 반환되는 html 코드를 useState에 담아줍니다.
modules.toolbar에 값을 넣고, <ReactQuill />에 props로 넣어주면, 툴바를 커스텀 할 수 있습니다.
import { useState } from 'react';
import ReactQuill from 'react-quill';
import 'react-quill/dist/quill.snow.css';

export default function NoticeAdd() {
  const [content, setContent] = useState('');

  const modules = {
    toolbar: [
      ['bold', 'italic', 'underline', 'strike'], // toggled buttons
      ['blockquote', 'code-block'],

      [{ header: 1 }, { header: 2 }], // custom button values
      [{ list: 'ordered' }, { list: 'bullet' }],
      [{ script: 'sub' }, { script: 'super' }], // superscript/subscript
      [{ indent: '-1' }, { indent: '+1' }], // outdent/indent
      [{ direction: 'rtl' }], // text direction

      [{ size: ['small', false, 'large', 'huge'] }], // custom dropdown
      [{ header: [1, 2, 3, 4, 5, 6, false] }],

      [{ color: [] }, { background: [] }], // dropdown with defaults from theme
      [{ font: [] }],
      [{ align: [] }],
      ['link', 'image'],

      ['clean'], // remove formatting button
    ],
  };

  return (
    <ReactQuill
      theme="snow"
      value={content}
      onChange={setContent}
      modules={modules}
    />
  );
}
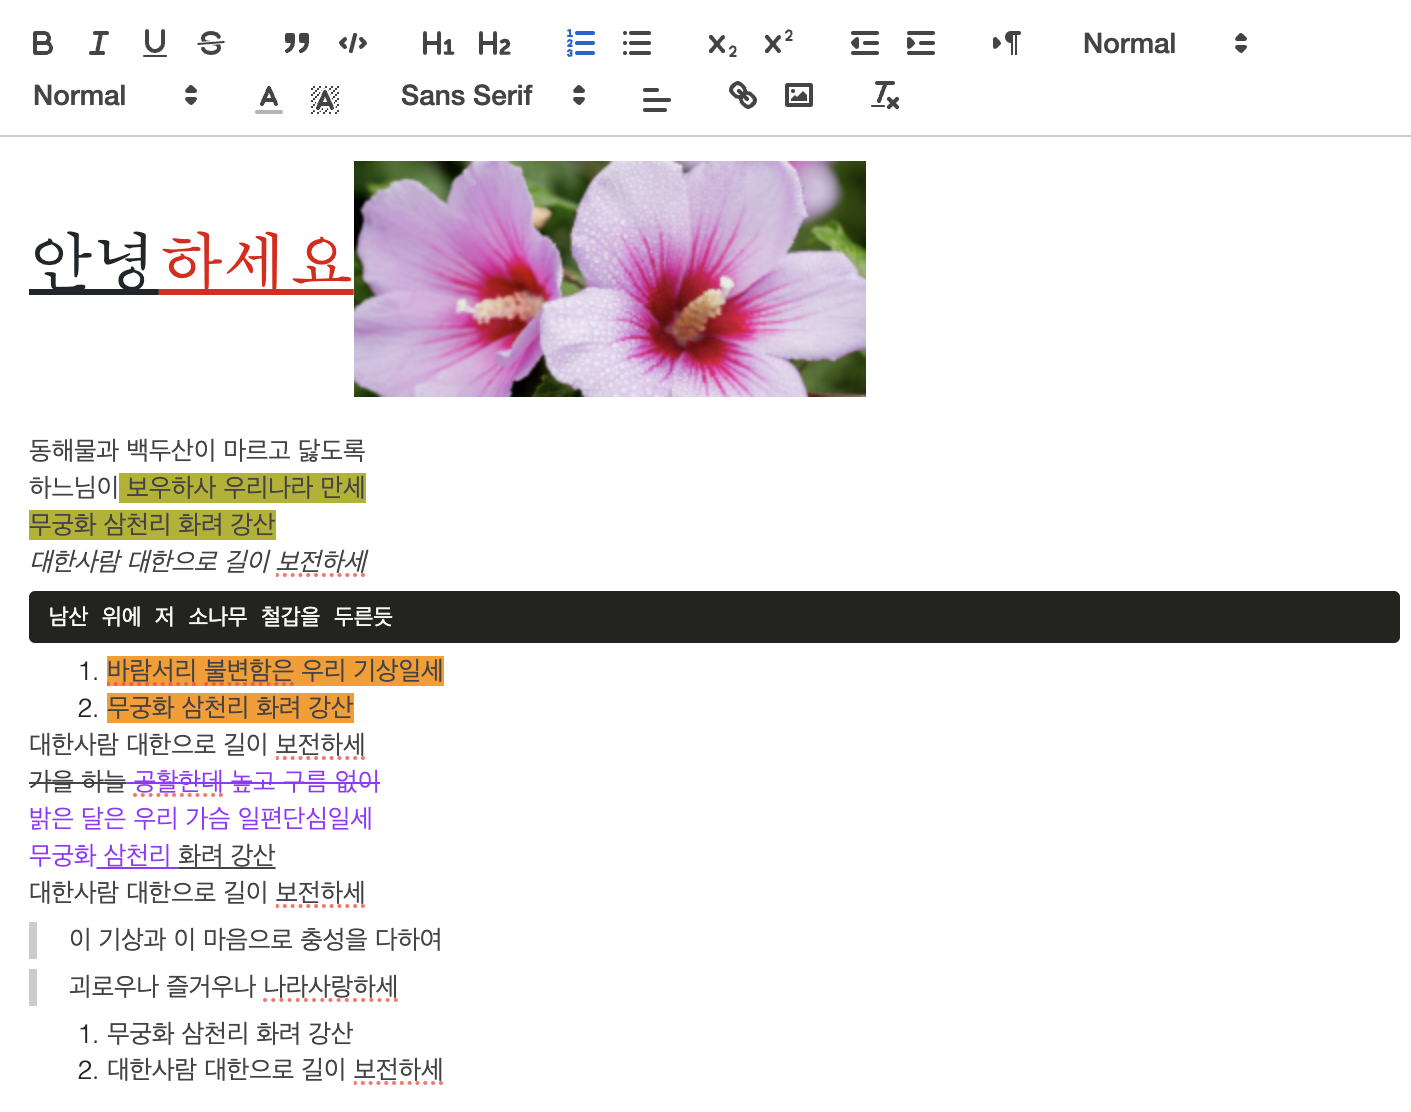
작성중인 react-quill 에디터 화면
3. View 화면 구현
quill이 반환하는 데이터를 살펴보면 html을 문자열로 변환시킨 형태입니다.
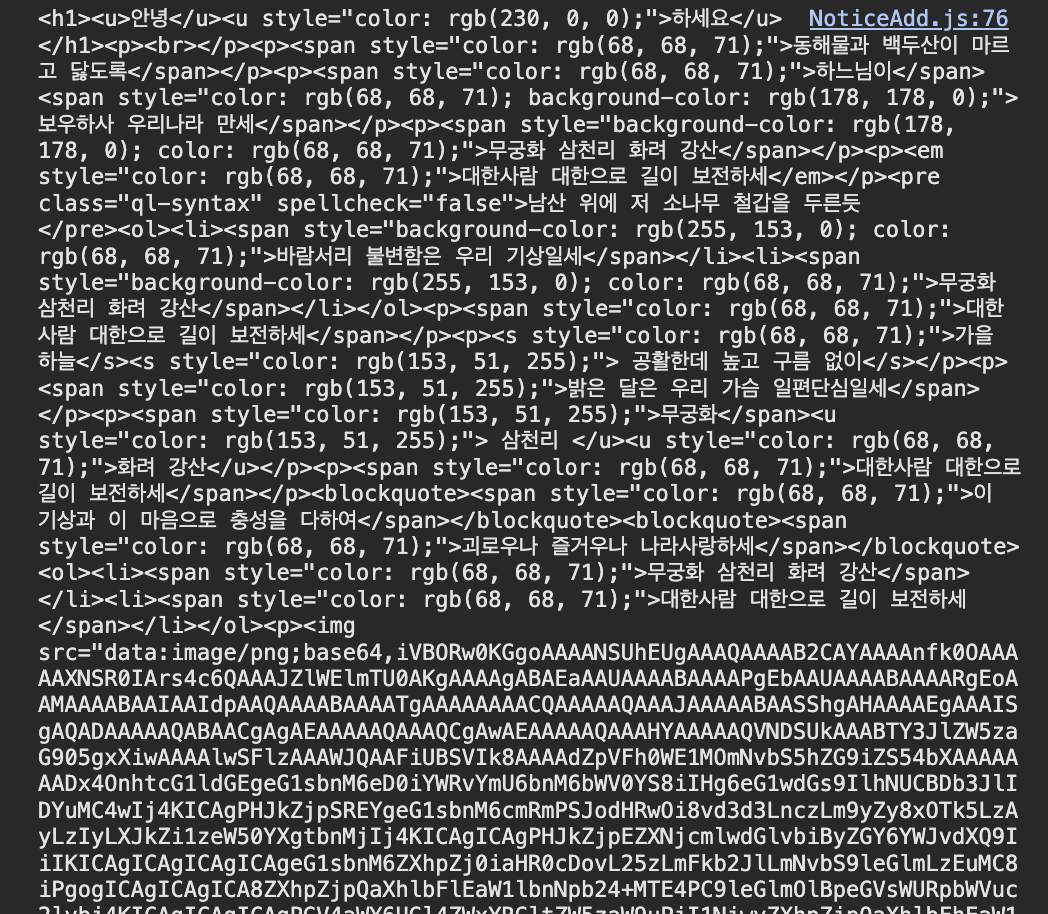
dangerouslySetInnerHTML 속성을 이용해서 이 문자열을 값으로 넣어주면 됩니다.
<div dangerouslySetInnerHTML={{ __html: content }} />
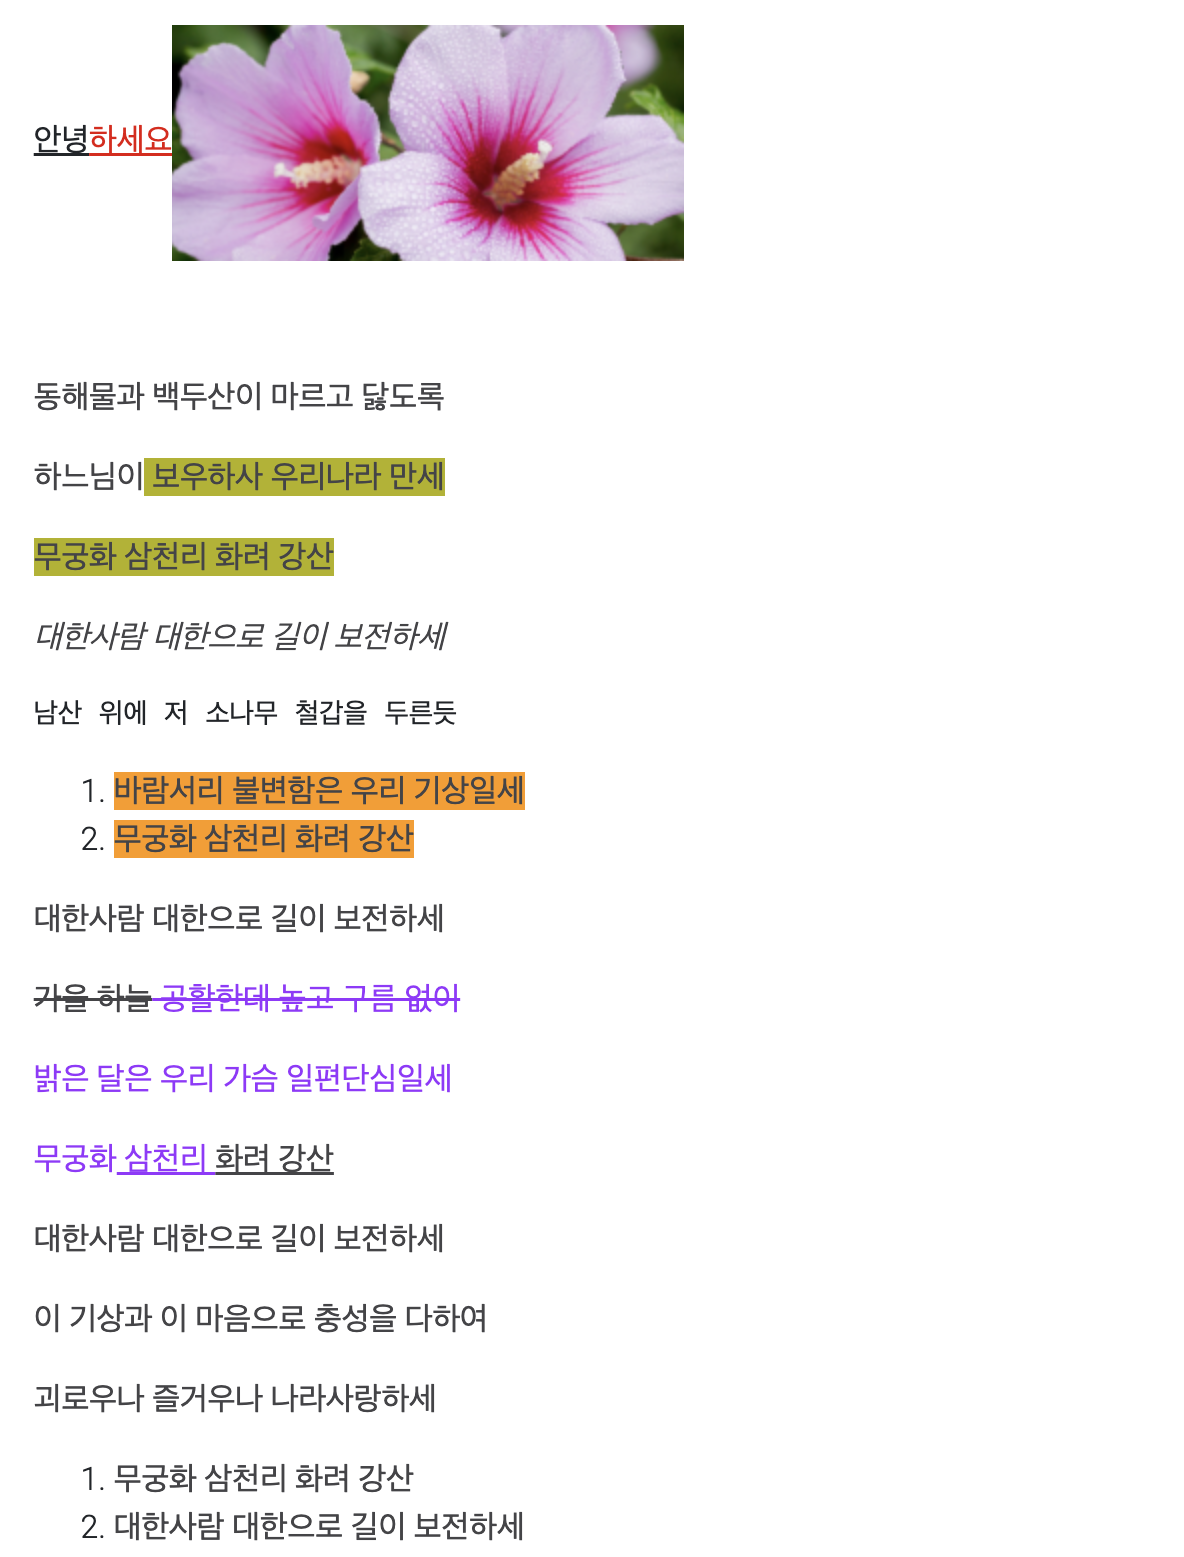
결과